Last year I worked with Convex to help build their iOS and Android client libraries. One good chunk of the project was wrapping their Rust client library so it could be used via FFI in Swift and Kotlin.
I used the UniFFI project from Mozilla to do a lot of the heavy lifting (generating the Rust C-compatible interface and the Kotlin and Swift bindings). I wrote a Rust wrapper that exposed the standard convex-rs client in a mobile-friendly way, created the special UniFFI manifest to describe what the FFI should look like and finally wrote idiomatic Swift and Kotlin code to wrap the generated bindings (not to mention various build and packaging fun …).
It all turned out quite well, but recently I’ve been wanting to peel back the layers a bit as well as to do a project involving Rust and Flutter with Dart FFI1. So let’s see what a more manual integration of Flutter, Rust and an iOS app looks like.
NOTE
This is very much a “Hello, world” tutorial - even though it knits together a few systems, it doesn’t go into depth into any one of them. In fact, the final code will only run on an iOS simulator. Definitely do additional research/learning in Flutter, Rust and iOS dev and keep an eye out for a future article on making it work on both a physical device and simulator.
Starting in Rust
We’re going to go really simple on the Rust side and just start with the template library project.
cargo new --lib hello
That will create a new Rust library project called “hello” in the hello directory.
As of today, that generates one public function in src/lib.rs that adds two numbers and returns the result.
pub fn add(left: u64, right: u64) -> u64 {
    left + right
}
Exposing a C compatible interface for add
Now we’ll do some small work to expose that function with a C compatible interface.
First let’s create a new src/ffi.rs file. It’s going to import the add function and perform the necessary ceremony to make it C compatible.
use std::os::raw::c_ulong;
use crate::add;

#[unsafe(no_mangle)]
pub extern "C" fn rust_add(left: c_ulong, right: c_ulong) -> c_ulong {
    return add(left, right);
}
This will give us a function called rust_add that will be available in our compiled library. At this point you might notice that your IDE or editor isn’t actually compiling/checking this new file. You’ll need to add the following line to the top of src/lib.rs to make it part of your library.
// src/lib.rs
pub mod ffi;
Build for iOS
Finally, let’s update Cargo.toml to ensure we’re building a library compatible with iOS. Add this before the empty [dependencies] section.
[lib]
crate-type = ["staticlib", "cdylib", "rlib"]
Now you should be able to build the library for iOS! I’m going to target just the simulator since this is a “Hello, world” style project and not a comprehensive guide.
cargo build --target aarch64-apple-ios-sim --release
That should produce output like:
   Compiling hello v0.1.0 (/path/to/hello)
    Finished `release` profile [optimized] target(s) in 0.45s
If you see an error, you might need to install the iOS simulator support with rustup. For Apple Silicon use:
rustup target add aarch64-apple-ios-sim
Okay, that’s it for the Rust part.
Moving on to Flutter
In your terminal, go back to the parent directory of your hello Rust library. Start a new Flutter project like so:
flutter create --platforms ios hello_flutter
That will bootstrap a Flutter app with support for running on iOS devices. flutter create generates a basic app that counts how many times a button has been pressed.
We’ll modify this app to call the rust_add function.
Wiring up the foreign code
We need a bit of Dart code that will tap into the rust_add function in the native library that we compiled.
The code for calling rust_add will be quite simple, really, as we’re not having to deal with any memory management or pointers or anything. If you integrate any foreign code that operates on other data like strings or other data structures, that’s something you’ll need to investigate and account for.
Here’s the simple code that will bridge the gap between Dart and the native library - save this next to your lib/main.dart as lib/libhello.dart.
import 'dart:ffi';

typedef RustAddNative = Int64 Function(Int64 left, Int64 right);
typedef RustAdd = int Function(int left, int right);

class Hello {
  late final DynamicLibrary _lib;
  late final RustAdd _rustAdd;

  Hello() {
    _lib = DynamicLibrary.open('LibHello.framework/LibHello');
    _rustAdd = _lib.lookupFunction<RustAddNative, RustAdd>('rust_add');
  }

  int add(int left, int right) {
    return _rustAdd(left, right);
  }
}
That defines both the shape of the native code as well as the Dart interface we want to offer for it. In this example, it mostly just differs on the types that each side uses.
Finally it wraps it all in a Hello class with an add method that we can call in the Flutter code. It looks just like any old Dart class to consuming code.
Calling the native code in Flutter
Let’s update lib/main.dart to call Hello.add (which calls through to rust_add).
Modify the first few lines of lib/main.dart to look like this:
import 'package:flutter/material.dart';
// Add this import so you can create a `Hello` instance.
import 'package:hello_flutter/libhello.dart';

void main() {
  runApp(const MyApp());
}

// An instance of `Hello` that we can use in the app.
final libhello = Hello();
Now we need to update one more section of code toward the bottom of lib/main.dart. We’re going to call the Hello.add function to add the button press count with another number and show the result.
            // This code already exists to show the button press count.
            const Text('You have pushed the button this many times:'),
            Text(
              '$_counter',
              style: Theme.of(context).textTheme.headlineMedium,
            ),
            // This is the code you'll add to call into the native library.
            const Text('The count plus 42 is:'),
            Text(
              '${libhello.add(_counter, 42)}',
              style: Theme.of(context).textTheme.headlineMedium,
            ),
Okay, that’s it for the Flutter/Dart code!
Configuring the iOS build
Try to run the app now and see what happens. You should be able to call flutter run from the command line or trigger it in your IDE.
You’ll likely be greeted by a wall-of-text error stating something like:
Invalid argument(s):
Failed to load dynamic library 'LibHello.framework/LibHello'
That’s because despite creating the native library from our Rust code and writing the Dart code to call it, we haven’t included the native library in the application! To do that, we’ll need to open our Flutter app’s iOS code in Xcode.
Fire up Xcode and open hello_flutter/ios/Runner.xcworkspace. We’re going to create a Framework to wrap the native library that we compiled earlier and bundle it in the iOS app.
- Click File -> New -> Target
- In the dialog that appears, make sure the iOS page is selected
- Select the Framework option and click Next
- For Product Name enter LibHello and click Finish
Now we’re going to work in the Project Navigator which is probably open on the left side of the screen (showing something like a folder structure).
Using Finder or the terminal, copy the hello/target/aarch64-apple-ios-sim/release/libhello.a into hello_flutter/ios/LibHello. If you use Finder, drag it right into LibHello in the Project Navigator and choose to copy it in the dialog that pops up.
Now we’ll ensure that libhello.a gets built in to the LibHello Framework.
- lick on your top-level Runner item in the Project Navigator
- Click LibHello under Targets
- Click the Build Settings tab and ensure that All is selected in the filter bar
- Type “linker” in the Filter and look for Other Linker Flags
- Double-click the empty Other Linker Flags entry and use the + button to add these two values
-force_loadLibHello/libhello.a
Without this step, I believe that Xcode thinks nothing is using libhello.a and it gets removed from the final application.
TIP
If you want to go deeper on your own and have the code work on both a simulator and physical device, look into building an XCFramework that combines libraries targeting different platforms. You’ll need to build the Rust lib for the standard iOS physical device target as well.
Your hybrid Flutter + Rust + iOS application
Now run your app again with flutter run or your IDE.
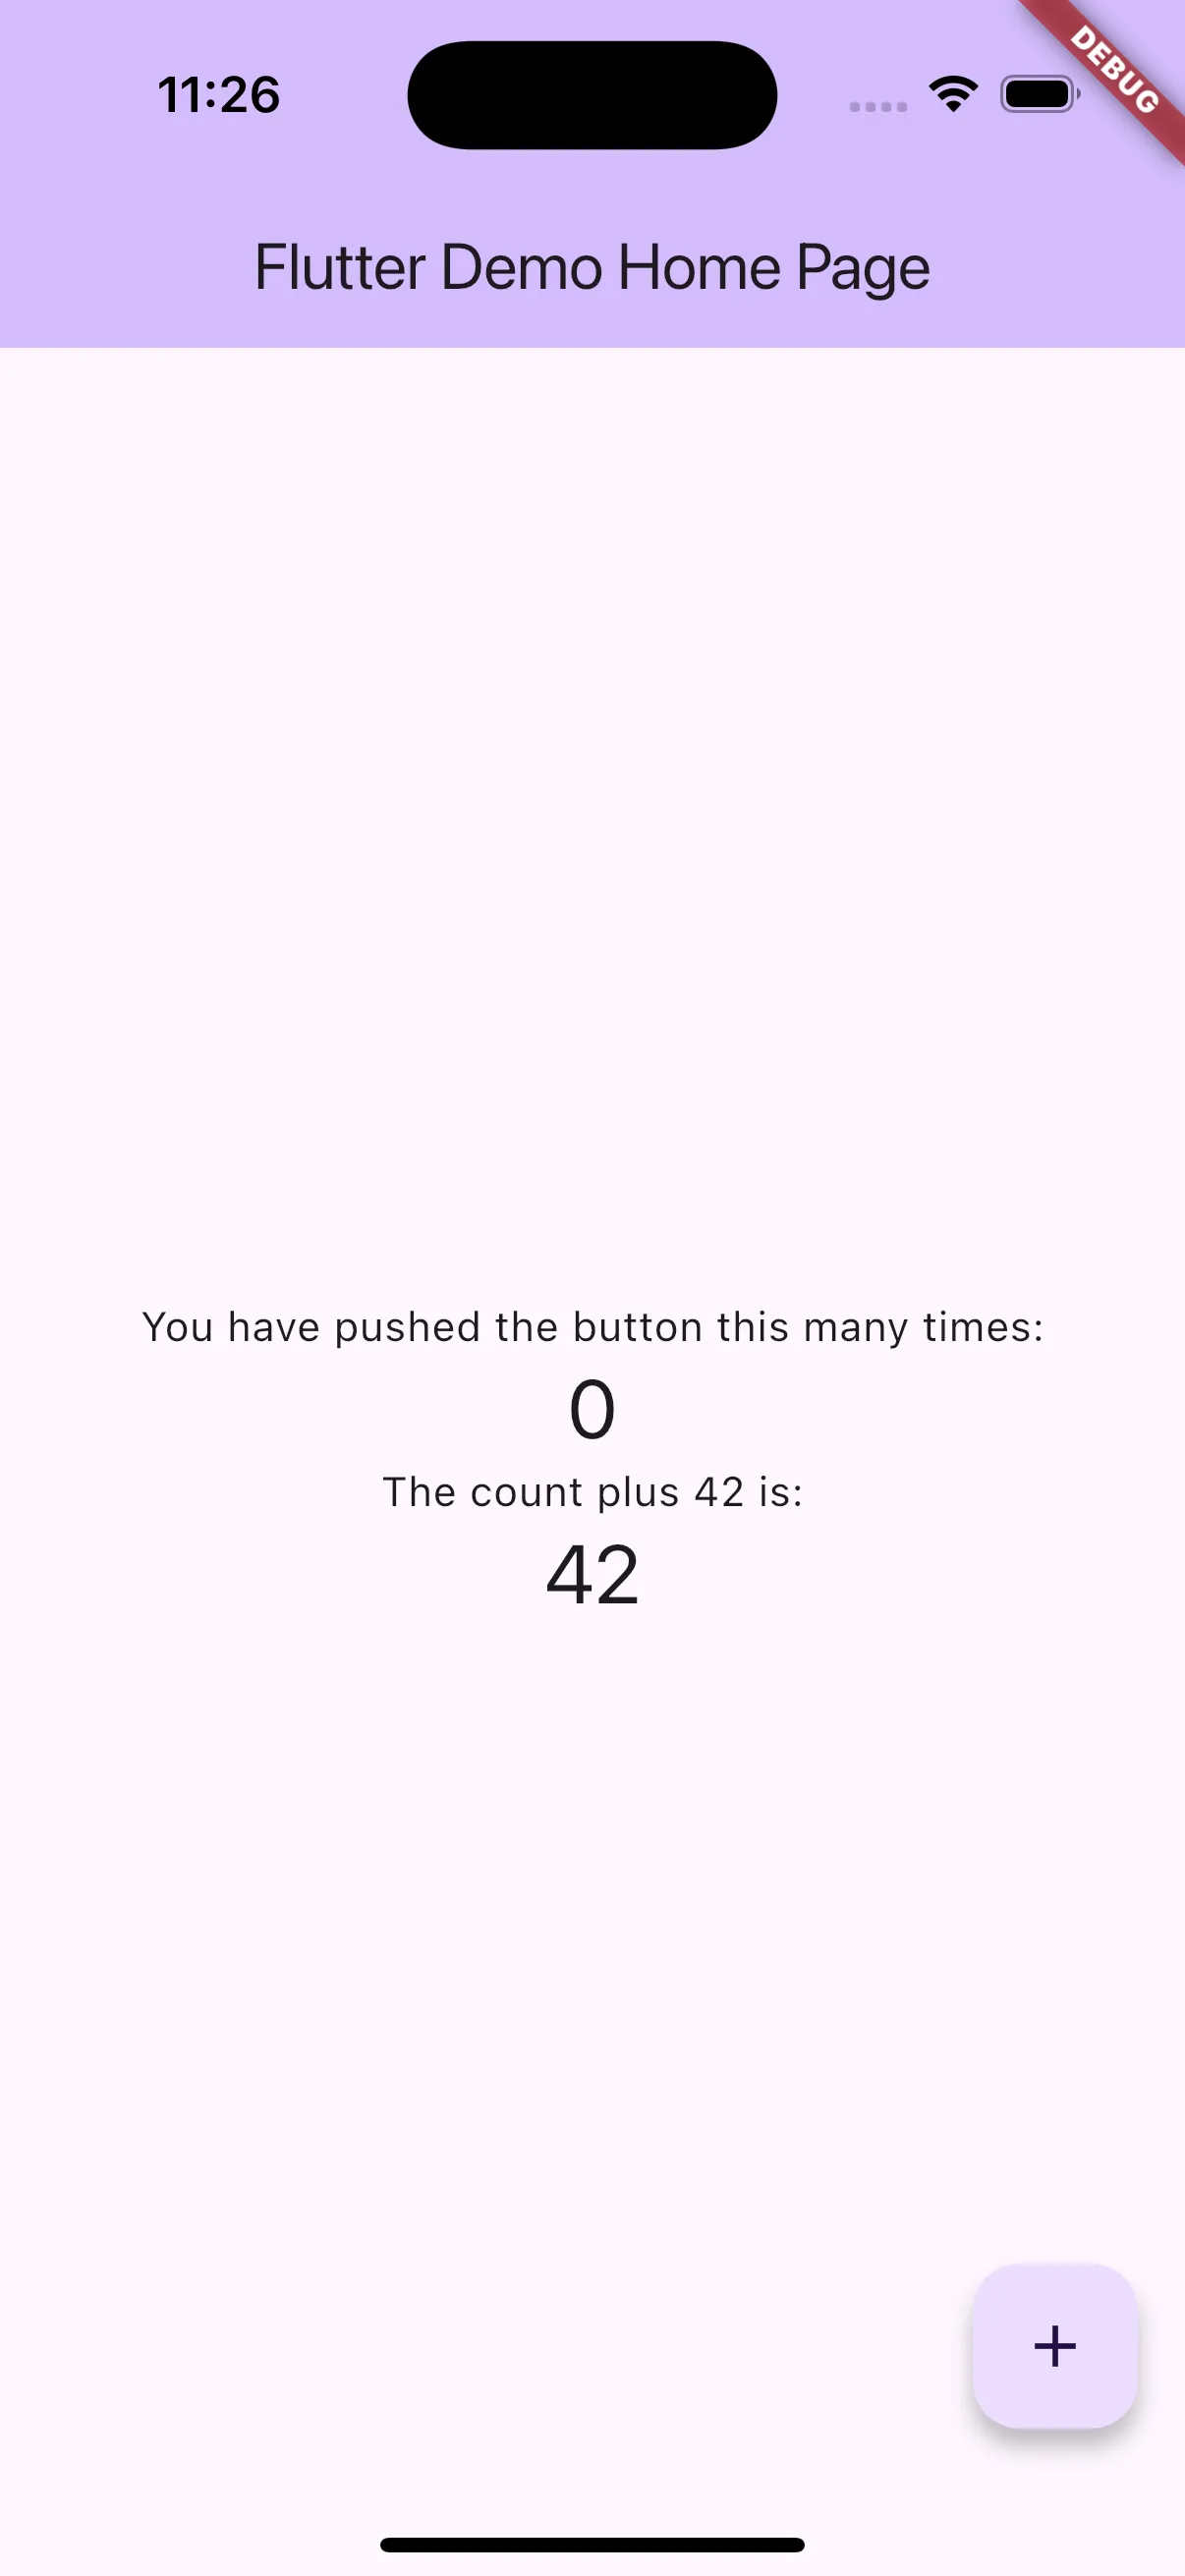
You should see the home screen appear showing a button press count of 0 and the addition result of 42. As you click the button, both numbers should change, but the magic is that the addition result is being performed in your Rust native library.

I hope this was helpful and gets you up and running with Flutter and Rust in an iOS app!
NOTE
If you want to take this from a development concept to a real application, you’ll need to look into building the native library for regular iOS device targets and also take note of the official Flutter iOS integration docs on code stripping.
Footnotes
-
Flutter has support for FFI plugins - if you’re looking to distribute or share native code across apps, take a look at that approach. ↩
